2007/06/23
[教學][筆記]在3dsmax 9當中製作三種女性短髮hair
3ds max發展到第九版, 它的頭髮功能已經相當成熟了. 自3ds max 8 開始把過去的頭髮外掛功能納入主程式當中, 在第9版當中又改善了介面 使用者能夠在視阜當中直接剪裁, 梳理, 改變頭髮長度, 使得3ds max 9嚴然變成虛擬的理髮廳般. 在本快速教學裡 你將學到三種女性短髮造型的製作. 經由給予Hair and Fur修改器, 你能夠在3ds max 9當中替你虛擬人物製作頭髮造型.
流程:
1. 自頭模型當中擷取頭皮的mesh
2. 加入hair anf fur修改器
3. 利用Hairstyle功能將頭髮變長
4. 利用recomb功能梳頭
5. 利用dynamics功能讓頭髮自然地貼著頭皮
6. 利用translate功能梳頭
7. 利用cut功能修剪多餘頭髮
教學影片 (總長35分鐘, 分成兩部份)
Part1
320x240
720x480
Part2
320x240
720x480
[更多文章]
[tutor][video]Create three hairstyles in 3dsmax 9
Tutorial results:
In this quickstart video tutorial you will learn to create there different hairstyles for girls in 3ds max 9. By applying "Hair and Fur" modifier to your scalp meshes; you will stylize the hairs for your model in 3ds max virtual world. No third-party plugins required.
Workflow:
Video tutorial (Running time: 35 mins, split into two parts)
Making of Ferrero Rocher (chocolate)
Marilyn Monroe-style blow skirt
In this quickstart video tutorial you will learn to create there different hairstyles for girls in 3ds max 9. By applying "Hair and Fur" modifier to your scalp meshes; you will stylize the hairs for your model in 3ds max virtual world. No third-party plugins required.
Workflow:
1. extract mesh from head model for the scalp
2. apply "hair and fur" modifier to the scalp mesh
3. Hairstyle/ scale up the hair
4. recomb the hair
5. Use the dynamics simulation to make the hair looks more natural
6. Translate(comb) the hair
6. Cut hair if the hair is too long
Video tutorial (Running time: 35 mins, split into two parts)
Part 1
Part 2
[More tutorials]Making of Ferrero Rocher (chocolate)
Marilyn Monroe-style blow skirt
2007/06/08
[教學][筆記]shit狗屎與蛆
[tutor][video]Crowd simulation: Shit and Maggots
Tutorial results:
Beacuse animate a worm (maggot) is easy (compare with ants...etc), in this video turorial I use maggots to demostrate how to use animation states to control the animation clips of the maggots. This is a intermediate video tutorial about crowd simulation in 3ds max character studio. The maggot basically has two states (a)moving state (b)static, not moving state. We set the maggots switch those states by monitoring the its moving speed. I f the speed is faster than 2 run state (a); if the speed is less than 1 run state (b). All animation create in 3ds max 7, no thirld-party plugins are required.
Video tutorials (Ruuning time: 34mins, split into 2 parts)
video 01
Video 02
[more tutorials]
2007/06/05
[教學][筆記]Formosa mudskipper台灣彈塗魚製作過程
最終完成的測試影片:
首先就是要建模. 如果手邊沒有ㄧ隻彈塗魚的話, 建模最好能有充分的參考圖片. 上圖就是Neo所拍攝的彈塗魚正面 側面 上視圖 底視圖. 正面的那張有點偏了 最好的情況是彈塗魚直直往前看.
在真正在電腦前建模 還是建議先用手繪的方式多多了解你的建模目標. 繪製各個面向 是幫助你了解彈塗魚構造的好方法.
從各個角度畫彈塗魚 手會ㄧ些生態照 這樣當真正建模時會更得心應手. 在紙上多花一點時間就能使你在電腦前少浪費一點時間. 總之手繪這個步驟絕對不能省.
真正建模啦! 我是用最簡單的Box-modeling加上polygon modeling方法. 其實就是不斷extrude, 割面, 調整vertex, extrude...而已. 請注意我設定了上, 下, 前, 側面的參考照片 方便建模.
Polygon modeling完成後給予meshsmooth modifier. 用Finalrender算圖一下.
再來就是貼圖了. 想要有好的貼圖一定要拆出好的UVW. 方法是分別選取個別肢體 然後個別拆UVW 最後再慢慢接合各部位. 要讓材質完全沒有接縫是不可能的 但是可以盡量讓縫隙留在比較不明顯之處. 暫時加上棋盤材質可以幫助判斷UVW是否拆的夠好. 重點在於1. 每個棋盤格大小盡量ㄧ致2. 棋盤格的分布要方正無接縫. 怎樣都弄不好的地方可能還是需要借重像是Deeppaint這類的軟體了.
剛開始繪製Diffuse貼圖時 縫隙的問題較大. 之後在Photoshp當中修正.
為了表現出彈塗魚鰭半透明的效果 這裡添加了透明貼圖.
ㄧ但diffuse貼圖完成後 其餘的透明貼圖 凹凸貼圖與高光貼圖變很容易產生.
全部的貼圖都應用到模型當中了. 整體看起來更加栩栩如生.
因為是動畫 所以也要考量到彈塗魚的各種動作 ㄧ開始我是採取morph target的方式 製作各種動作 然後以block controller模組化各個動作. 事後發現這樣做很沒效率 方法也不對.
跟靜態模型一樣要手繪製 動態也是一樣. 製作彈塗魚的動畫前 先研究一下牠的前肢如何運動. 眼睛如何閉眼.
嘴吧呼吸的動作 以及面部mesh的移動方向.
動畫最重要就是要知道動作持續時間多長 這裡以跳為例 動作持續19個frames. 每個frames的變化都要事先記錄起來 這樣ㄧ旦在電腦桌前製作動畫時才能有效率地製作.
用Vue 6製作場景後輸出至3ds max 7. 整個渲染很耗資源...意思就是很沒效率.
製作過程的影片:
[更多文章]
推薦幾個3ds max免費外掛plugins的網站
朋友Neo因為比賽需要請我製作了彈塗魚(mudskipper)的3D動畫. 原先的構想是製作數位版的彈塗魚可以合成到實拍的影片當中 本篇就介紹我如何製作以及遇到哪些技術瓶頸.
首先就是要建模. 如果手邊沒有ㄧ隻彈塗魚的話, 建模最好能有充分的參考圖片. 上圖就是Neo所拍攝的彈塗魚正面 側面 上視圖 底視圖. 正面的那張有點偏了 最好的情況是彈塗魚直直往前看.
在真正在電腦前建模 還是建議先用手繪的方式多多了解你的建模目標. 繪製各個面向 是幫助你了解彈塗魚構造的好方法.
從各個角度畫彈塗魚 手會ㄧ些生態照 這樣當真正建模時會更得心應手. 在紙上多花一點時間就能使你在電腦前少浪費一點時間. 總之手繪這個步驟絕對不能省.
真正建模啦! 我是用最簡單的Box-modeling加上polygon modeling方法. 其實就是不斷extrude, 割面, 調整vertex, extrude...而已. 請注意我設定了上, 下, 前, 側面的參考照片 方便建模.
Polygon modeling完成後給予meshsmooth modifier. 用Finalrender算圖一下.
再來就是貼圖了. 想要有好的貼圖一定要拆出好的UVW. 方法是分別選取個別肢體 然後個別拆UVW 最後再慢慢接合各部位. 要讓材質完全沒有接縫是不可能的 但是可以盡量讓縫隙留在比較不明顯之處. 暫時加上棋盤材質可以幫助判斷UVW是否拆的夠好. 重點在於1. 每個棋盤格大小盡量ㄧ致2. 棋盤格的分布要方正無接縫. 怎樣都弄不好的地方可能還是需要借重像是Deeppaint這類的軟體了.
剛開始繪製Diffuse貼圖時 縫隙的問題較大. 之後在Photoshp當中修正.
為了表現出彈塗魚鰭半透明的效果 這裡添加了透明貼圖.
ㄧ但diffuse貼圖完成後 其餘的透明貼圖 凹凸貼圖與高光貼圖變很容易產生.
全部的貼圖都應用到模型當中了. 整體看起來更加栩栩如生.
因為是動畫 所以也要考量到彈塗魚的各種動作 ㄧ開始我是採取morph target的方式 製作各種動作 然後以block controller模組化各個動作. 事後發現這樣做很沒效率 方法也不對.
跟靜態模型一樣要手繪製 動態也是一樣. 製作彈塗魚的動畫前 先研究一下牠的前肢如何運動. 眼睛如何閉眼.
嘴吧呼吸的動作 以及面部mesh的移動方向.
動畫最重要就是要知道動作持續時間多長 這裡以跳為例 動作持續19個frames. 每個frames的變化都要事先記錄起來 這樣ㄧ旦在電腦桌前製作動畫時才能有效率地製作.
用Vue 6製作場景後輸出至3ds max 7. 整個渲染很耗資源...意思就是很沒效率.
製作過程的影片:
[更多文章]
推薦幾個3ds max免費外掛plugins的網站
2007/06/04
[tutor][video]Convert a run cycle to a turn-right run cycle in 3dsmax
Everybody know in character studio, you can only create a footstep animation first then convert to freeform. You can not create freeform then convert to footstep. In this video tutorial we are going to get away with that drawback by first saving our run cycle bip file, them import this motion though "motion capture" rollout where it containg a footstep extraction fuction. By doing so, we can create convert a run cycle to a run-to-turn motion file.
Video tutorial (Running time: 7mins)
[tutor][video]Create a simple walk cycle in 3ds max 7
This is a fairly simple tutorial demo you how to create a walk cycle in 3ds max.
[Related topic]
Free motion files to download (bip format)
People have been asking me many times if I can send them motion capture files (walk, run and walk..etc) after they read my video tutorial about "Faking human motion with ragdollmaxscript".
Here I made about ten number of biped motion files including walk, female walk, running, reun-towalk, walk-to run, walk-turn-left...ect. They are create by using keyframing methods, they are not perfect but can be very useful when you don't have any...
Click HERE to download the motion pack (400kb rar file).
Thank you all support my blog.
[More tutorials]
faking human motion with ragdoll maxscript (HOT!)
Air explosion with Afterburn in 3dsmax 9
2007/06/02
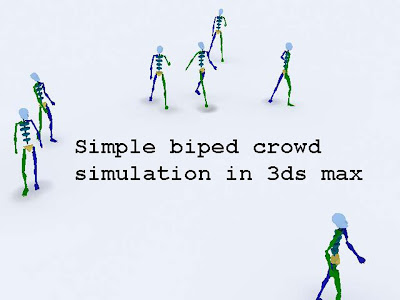
[tutor][video]simple biped crowd simulation in 3dsmax
In this quick video tutorial you will learn how to create simple biped crowd simulation in 3ds max 7, no plugin require!
Workflow:
1)create a plan
2)create a delegates
3)create a crowd helper
4) with crowd selected, go to setup/scatter
create 6 more delegated using the scatter tool
5)create wonder around behavior/avoid behavior/
6)create 7 numbers of bipeds
7)associate those biped with the delegates
8) select any bone of any biped/setup motion flow, save the motion flow file. Share this motion flow with other biped.
9)Create random motion for every bipeds
10)set up delegates clip start frames
11)set up priority
12)run the simulation by click on "solve"
Video tutorial (Running time: 16mins)
320x240 (Youtube)
720x240 (blip tv)
[Free dowload]
[More tutorials]
Modeling a bottle of laundry detergent (NURBS modeling)
Subscribe to:
Posts (Atom)